
Back in the 80's duffle bags were all the rage. Everyone I knew had several of them. I'm not quite sure what made me think of doing this, but I decided to make a retro-style duffle in this awesomely bright fabric, Dots & Daisies. To give it a bit more of that homemade look, I quilted it and used a bright coordinating fabric called Kimono for the interior.


I gave the bag handles and an adjustable strap to give it versatility. I'm seriously in love with this bag. I've been using it for overnight getaways and toting around my girls toys.
I'm so ecstatic about this project that I want to share the directions on how to make one with you!
This took me a few hours to complete. It isn't difficult, just time consuming. You can definitely simplify it by using pre-quilted fabric and eliminating the adjustable strap (which will also eliminate the need for most of the hardware).
You can also add a pocket between the handle straps if you like (I am not including directions for that in this tutorial), but anyone familiar with bag-making can do this quite easily.
OK....ready? Here we go....
MATERIALS NEEDED:
Bag Exterior
1 yard quilting cotton
Bag Interior
1 yard quilting cotton
Bag Handles &
Strap
¾ yard quilting cotton
½ yard fusible interfacing (medium weight)
Fusible Fleece
1 yard
**NOTE: If you
want to simplify this project you can purchase double-sided pre-quilted fabric
instead of making your own. If you
do this, you will need 2 yards and you can eliminate the Fusible Fleece and
additional fabric/interfacing for the handles and straps.
Notions
22” Sport Separating Zipper (thick plastic teeth, must be able to completely
unzip)
1 1.5” Bar Slide
2 1.5 “ D Rings
CUT
Exterior Fabric:
TWO (2) circles., 11” diameter
35” x 20” rectangle
Interior Fabric:
2 circles, 11” diameter
35” x 20” rectangle
Fusible Fleece:
35” x 20” rectangle
2 circles, 11" diameter
2 circles, 11" diameter
Handles & Strap Fabric
FOUR (4) strips measuring 5.5” x 43-45” (width of fabric)
ONE (1) strip measuring 5.5” x 8”
Fusible Interfacing
FOUR (4) strips measuring 5” x 43-45
ONE (1) strip measuring 5.5” x 8”
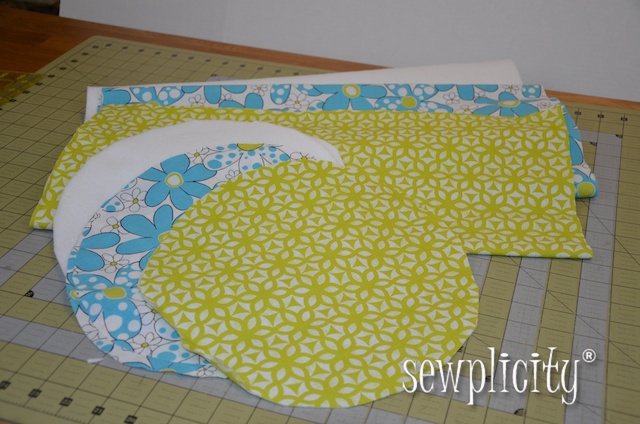
IRON
Iron the fusible fleece to the wrong side of the Exterior
Fabric then iron and pin the Interior fabric on the other side of the fleece,
right side up. The fleece will be sandwiched in-between the two pieces of
fabric…both fabrics right sides are facing out.

Do the same for the circles. You will have 2 sandwiched 11” circles.

Iron the fusible interfacing to all the strips of
strap/handle fabrics and set aside for later.
QUILT
Using a quilting foot, quilt lengthwise down the main bag
“sandwich”. Start at the right
hand side and use your sewing foot as a guide to keep your lines straight. This is a little time consuming and
tedious, but the final result is well worth it!
Once finished, trim the rectangle to exactly 33 ¾ “x 19” (I
have you trim this after quilting to accommodate any shift in fabrics while
sewing)
Repeat for the two circles.

If you have a serger, serge all the raw edges because they
will be exposed in the finished bag.
If you do not have a serger, a simple zig-zag stitch will clean up the
edges just fine.
ATTACH THE ZIPPER
Fold the short ends of the main quilted fabric under towards
the interior ½” and press.


Center and pin one side of the zipper under the folded
edge. Sew the zipper to the
fabric.


With the zipper closed, pin the other side of the zipper to the other short side of
the quilted fabric. AFTER you have
the zipper pinned in place, unzip the zipper and sew in place. It is important to unzip only once
everything is pinned in place or you will end up with an uneven zipper!
Once both sides are sewn, zip it up to check that it zips
properly. If not, go back and fix
it before continuing.

MAKE D RING TABS
Take the one piece of 5.5 x 8” of fabric and fold it in half
length-wise. Open, then fold the
long ends in to meet at the center, then fold in half again, concealing the raw
edges.


Sew around the perimeter using a 1/4” edge stitch. Cut the finished strip in half to
make two strips, which will become the tabs that hold the adjustable strap.
 |
| You only need the D rings, the slides pictured here are for the adjustable strap. |
Slip a D ring onto one strip and fold it in half. Sew across the strip at the end and
once again close to the D ring to prevent it from sliding around.

Repeat for the other strip. Set aside.
MAKE THE HANDLES
Sew three of the four 5.5 x 45” strips together (press seam allowances open) to make one
very long strip of fabric.
 |
| This photo shows the interfacing not yet on the strips.... |

Just like you made the tabs, press in half, then open and press the edges in toward the
center and fold in half again concealing the raw edges.
Cut this long folded strip to 100” in length and set aside
the extra as you will need this for the adjustable strap later.
Open the ends and press in the raw edges ½” and refold to
create a finished end. Edge stitch
around the perimeter ¼” from the edge.
ATTACH THE HANDLES
Find the half-way point of the 100" strap you made and crease.
Unzip the zipper and lay the duffle flat, right side facing
up. Find the center bottom of the
duffle by folding in half (zippers will meet) and crease.

Measure 6 inches in from each corner and mark. This is where your strap handles will be centered. Measure 6" in from each side along the bottom crease line on the bag and mark. Center and pin one finished end of the 100” handle down at this point. Wrap the strap up and around the top of the bag and have it come back down the other side making sure the crease marks of the strap (1/2 way point) lines up with the center crease line on the bag. Continue laying the remaining 50" of strap up and over and then back down the other side of the bag until the other finished edge meets up with the pinned finished edge.

Measure 4 inches down the strap handels from the zippered edges and pin. This will mark where you will stop and sew across the strap when sewing the strap to the bag. The top 4" of the strap will NOT be sewn to the bag.

Starting at one of your finished strap edges (in the center bottom of the bag), use a 1/4" seam allowance and sew up to the pin that is 4" down from the zippered edge. Turn and sew across the strap, reinforcing by sewing back and forth at least twice. Sew back down the other side of the strap using the same 1/4" seam allowance and continue all the way to the other side of the bag once again stopping at that 4" pinned marker. Sew across the strap again, reinforcing the stitch, and back down the other side of the strap until you meet where you started.

Repeat for the other side of the strap.
ATTACH THE D RINGS
Center these two tabs on the ends of the main duffle piece,
over the zipper with the duffle RIGHT SIDE OUT. The D rings should face each other and all the raw edges
should be facing outward. As you can see I let these overhang about 3/4 inch as I didn't want them to stick out too far)


Sew both tabs in place using ¼” seam allowance. IMPORTANT: Sew very slowly here.
When sewing over the zipper teeth, you may want to hand crank the
machine to avoid breaking a needle.
Back tack at start and finish.
Trim any excess zipper/tab fabric off.

ATTACH SIDES
Turn the duffle WRONG SIDE OUT.

Starting at the zipper, pin one quilted circle WRONG SIDE
OUT, to the duffle end.

Sew using a ½” seam allowance.

OPEN THE ZIPPER ½ WAY!

Repeat for the other side.
If desired, you can serge the interior seams for a more
finished look.
Turn right side out.
Almost there…..
MAKE THE ADJUSTABLE STRAP
Attach the excess strip from the handles to the leftover
piece of 5.5 x 4.5” strip. Just as
you did before, fold in half, then open and press the edges in toward the
center and fold in half again concealing the raw edges. Edge stitch around the entire length of
the long strip using ¼” seam allowance.
Open the ends and press in the raw edges ½” and refold to create a finished end. Edge stitch around the perimeter ¼” from the edge.

Take the strap wrong side up and thread one end through the center bar of the slider. Pull through about 2” , pin and stitch it down onto itself to hold the slider in place.

Pull through about 2” , pin and stitch it down onto itself to hold the slider in place.


Thread the free end of the strap through one of the D rings of the bag. Thread it back through the slider and then through the other D ring.


Stitch in place.


AND YOU ARE FINISHED! Great Job!


I love this!
ReplyDeleteI have book marked the tutorial - thank you!
Thanks for sharing, love your bag & tutorial!
ReplyDeleteSimply elegant! Nice job!
ReplyDeleteThis might just be the hospital bag I've been looking for when I'm due! :)
ReplyDeleteSO GREAT! It is a nice size for that. Please let me know how it turns out if you decide to make it!!!!
DeleteMade this tonight. Perfect! Thank you for inspiring the majority of my Christmas gifts this year! ~Dana
ReplyDeleteYeah! So happy to hear this. Please share pictures!!!! You can do so on my flickr group. http://www.flickr.com/groups/sharedsewplicity/
DeleteThank you for sharing. I'm doing the Susan G. Komen 3-Day walk in Seattle this September with a friend and thought it would be fun to make us pink matching duffles for our stuff.
ReplyDeleteHi Sherry! That is wonderful! If you do make them, please do take a picture of the two of you with the bags and share with me! I'd love to feature you on my blog!!!!!
DeleteI love this bag, in fact I started it last night. I do have a question for you though. I have never quilted anything so this will be my first attempt. When quilting the main section of the bag do I take my stitches all the way to the edge of the fabric then start a new line of stitches in the next row? If so, won't I be cutting my thread when I trim that piece down to 33 3/4 x 19? I just don't want it to come apart! Thanks, Michele
ReplyDeleteHi! Congrats on starting the bag :) There is no need to worry about trimming the quilted fabric. It won't come apart on you. You can zig zag or serge the raw edges to help secure, but I've never had a problem with quilted stitching coming apart. Remember, it is decorative only! When you buy a yard of quilted fabric from the store, they cut it without securing :) Good luck - please share a photo when finished in my flickr pool! http://www.flickr.com/groups/sharedsewplicity/
DeleteYour bag is beautiful. Thanks so much for sharing the tutorial. I've been looking for a duffel bag for ages and this is the one.
ReplyDeleteHi Maria, Thank you! I'm so glad to provide a useful tutorial for you. Please do share a photo when you are done....I'd love to see it :) http://www.flickr.com/groups/sharedsewplicity/
Deletei was curious, what is the finished size of this bag? I'm thinking about making a duffel for my silhoutte.
ReplyDeleteThanks!
It ends up being approximately 18" by 10" diameter. Enjoy!
Deletedid you put fusible fleece between the circles too? i did not see that in the cut instructions...
ReplyDeleteI can't wait to try this duffle. It is just what I have been looking for. Instructions are clear and I love the pictures. Thanks a million!
ReplyDeleteMy daughter wants a duffel bag for college but needs something bigger. Do you have a formula for making the diameter larger? If I want a 15" diameter what would the length of the square need to be?
ReplyDeleteThe length of the body piece will be the circumference of the circle....you can either use a circumference calculator (there are a bunch online), or cut out your circle and use a tape measure to measure around the circle. Don't forget to add about 1.5" to accomodate for seam allowance and trimming if your fabric becomes a bit "off" from the quilting! Good luck!
DeleteHello! Love the tutorial!
ReplyDeleteOne quick question: Is there fleece in the circle?
Thank you!
Hi Ashley,
DeleteYES! I have to clarify that :) Do put fleece inbetween the circles!
Thanks for pointing that out!
Hi there. Your tutorial is great. I have made 2 of these bags and given them to my daughters. They both love them so much. I'll add some pockets to the next one and can't wait to get started. Thank you so much!
ReplyDeleteThank you Debra! I'm so glad you are getting use out of it :) Be sure to share a photo on my Flickr Pool! http://www.flickr.com/groups/sharedsewplicity/
DeleteThis comment has been removed by a blog administrator.
ReplyDeleteHello again,
ReplyDeleteI finished my first bag for my mom and everyone raved about it. I've got two aunts and five cousins asking for them now! :)
This is an awesome tutorial. One question: This should come out the same if I halve the measurements to make a smaller bag, correct?
I would just try it but I'm afraid of wasting fabric/cotton. I'm a cheapskate!
Thank you for an AWESOME tutorial. It's really helped me build my confidence with sewing.
Hi Ashley! I'm so happy you are enjoying this tutorial! I don't see any issue with halving the dimensions, although I would use a circumference calculator to determine your side panels (just to be sure). Make sure to include that extra 1/2" seam allowance!
DeletePlease do share your results! Good luck!
-Jennifer
love it jennifer! how have i missed this tutorial? can't wait!
ReplyDeletecynthia
Thanks Cynthia! Please do share pictures when you finish. I'm sure you can come up with some awesome embroidery for this project!!!!
DeleteElla Vickers Sailcloth Collection (EVSC) is Sailing Duffels a selection of Recycled Sail Bags, Sailcloth totes, Sailing, Tote bags, Seabags, Duffel, Beach totes.
ReplyDeleteThis comment has been removed by a blog administrator.
ReplyDelete'Sup. I making mine different than yours( just lazy) but thank you for the tutorial your bag is so cute. :D
ReplyDeleteWow! Such a detailed tutorial!! Ur bag looks so cute! I am definitely going to try making this!!
ReplyDeleteI'am glad I found this website. Thanks for sharing this information. I am always look for people to check out my website.
ReplyDeleteDouble Duffle Bags
Just made two of these duffels. Excellent tutorial and excellent finished product.
ReplyDeleteSmileBazar is an online shopping site offering made in India Products. BuyDuffle Bag online at lowest prices. Hope you enjoy discovering new products.
ReplyDelete